Tutorials : UML modeling for information system architecture : Module 4: Create state diagrams : Lesson 4.3: Add states to the state diagram
Lesson 4.3: Add states to the state diagram
Draw a state diagram for the states of a reservation.
States represent the conditions of objects at certain points in time. Events represent incidents that cause objects to move from one state to another. Transition lines depict the movement from one state to another. Each transition line is labeled with the event that causes the transition. Actions occur when an object arrives in a state.
Note that Reservations can be in the following states:
In addition, every state diagram normally has a start state, which in UML notation is a shaded circle, or large bullet.
To draw a state diagram
1
Select the Initial State symbol from the toolbox or Draw menu and place an initial state on the diagram. Name it Receive Inquiry.
2
Select the State symbol from the toolbox and place a state symbol on the diagram. Name the state Provisional.
3
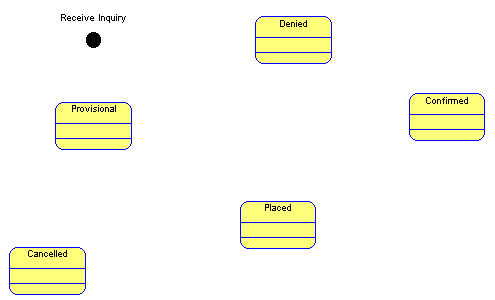
With the State symbol drawing tool still selected, drop down additional states and name them Placed, Confirmed, Denied, and Cancelled. Position the symbols on the diagram workspace as shown in the picture below:
A transition is represented by a vectored line labeled with the name of the event that causes the transition. So far, throughout most of this tutorial, you have been drawing straight or straight orthogonal lines. For the state diagram, however, you might want to use elliptical arcs for aesthetic reasons.
Change the Line Style to Elliptical Arcs
4
Select Format > Symbol Format > Line. In the Line Style dialog, toggle Elliptical Arcs and click OK.
Note When drawing elliptical arc lines, you can change the direction of the loop - after clicking to attach the start point of the line to a state symbol, release your mouse, and then, before you click again to attach the end point to the target state, right-click - you will notice the arc orientation of the loop in the line change. Continue right-clicking (before left-clicking to attach the line) to toggle between arc orientations.
5
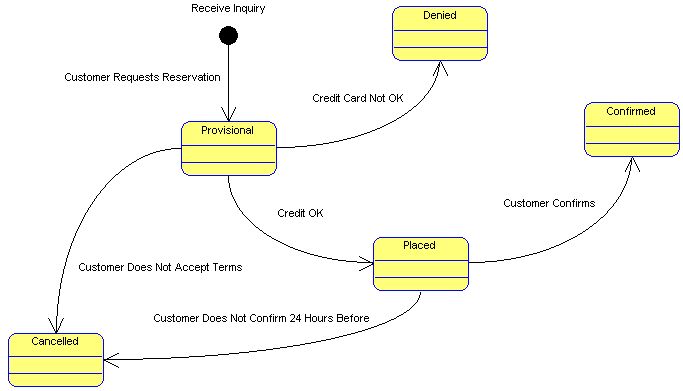
From the toolbox, select the Transition line tool, and draw a transition line between the initial state Receive Inquiry to the state Provisional. Name it Customer Requests Reservation.
6
Draw a transition line from the state symbol Provisional to the symbol Cancelled and name it Customer Does Not Accept Terms
Draw a transition line from the state symbol Provisional to the symbol Denied and name it Credit Not OK
Draw a transition line from the state symbol Provisional to the symbol Placed and name it Credit OK
Draw a transition line from the state symbol Placed to the symbol Cancelled and name it Customer did not confirm in 24 Hours
Draw a transition line from the state symbol Placed to the symbol Confirmed and name it Customer Confirms
The diagram should now resemble the one shown below:
Next
Lesson 4.4: Add actions to the state definition
See also
Module 4: Create state diagrams