1 Double-click the executable file you downloaded to run the installation.
The auto-run interface is launched.
2 Click Install.
3 In the Welcome screen, click Next to begin the installation.
4 Follow the instructions provided by the Installation Wizard.
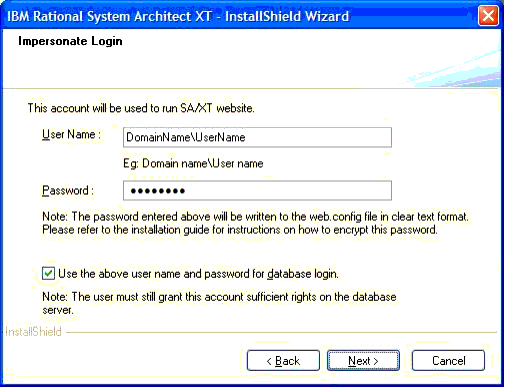
5 On the Impersonate Login screen, enter your User Name and Password values. System Architect XT submits these values to login to the SQL server.
Use the above user name and password for database login works as follows:
If you enable the option, System Architect XT uses Windows Integrated Security to login to SQL database server. By default, Microsoft SQL Server only allows login via Windows Integrated Security; this option should normally be checked if using Microsoft SQL Server. If in doubt, ask your database administrator what type of user authentication is used.
If you do not enable the option, and then click Next, the Database Login dialog is displayed. Enter the User Name and Password to login to the SQL databases, and then click Next. The user must be defined to use SQL Authentication if you use this option for Microsoft SQL Server.
6 Click Next.
7 In the Start Copying Files dialog, click Next, and then click Finish.
The System Architect and System Architect XT installations create an SA2001.INI file with startup and customization settings. Depending on your Windows version, the file is created in different folders.