Test the report in Grid mode, and create the report in HTML.
To generate the report
1 To test the report, click Generate. This provides an on-screen report in an interactive grid which has Save and Print buttons.
2 To print the report, click Print. Click OK to continue.
3 At the Save Changes to 'UNTITLED?' message, click Yes.
4 Name the new report file Tutorial.rpt.
5 Click OK.
The report can be modified in the future by choosing the File > Open Report File option of the Reports dialog and opening the tutorial.rpt file.
Learn more about final reports
A report does not have to start at the diagram level. Since relationships are bi-directional (e.g. "contain Symbols" vs. "is contained in"), a report can be written starting at any portion of the encyclopedia and working out. An example of this would be a process diagram having a parent process. To travel from the current process diagram to the parent process, the 'Is Child' relationship would be chosen.
Reports can be written to report on the entire encyclopedia (as we have just done for this tutorial) or the currently open diagram only (by selecting Current Diagram in the dialog box).
HTML Final Report
You can also create this report using HTML as the Report Type.
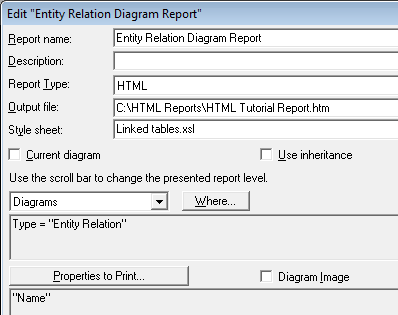
1 In the Add Report dialog, toggle on HTML under the Report Type property box, located in the lower right of the dialog.
2 In the Output File property field, click Browse to find/create a path that your report will generate to. You may also type in the path of your choice.
3 In the Style Sheet property field select Linked tables.xsl from the drop down list.
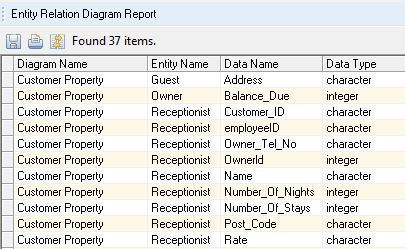
Your HTML Final Report should now resemble the diagram below: