You can export data from System Architect to Focal Point® by creating new profiles or reusing an existing profile. Profiles you create are saved as a Focal Point® profile definition type in System Architect, and can be accessed by other users in the same encyclopedia.
When you create a new profile, you must provide a name, select a workspace and a view, select a report, and map columns from criteria and data views in Focal Point® to criteria/data reports in System Architect.
To create a new profile
1 Click Tools > Focal Point.
The Focal Point® Login window is displayed.
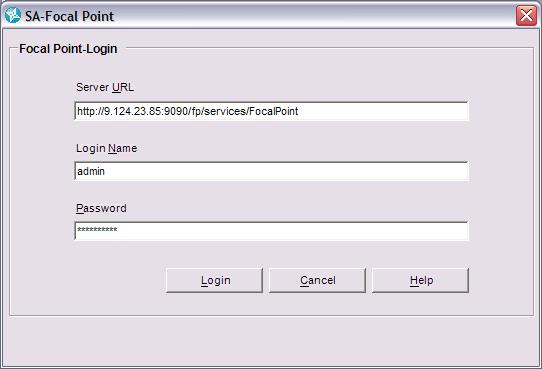
2 Login In the Focal Point®-Login dialog, enter values for each of the following fields:
Server URL
The URL points to the web service on the Focal Point® server. The URL format is:
http://<web server name>:<port number>/fp/services/FocalPoint
For example:
http://slt2008:9090/fp/services/FocalPoint
If you create a new profile and save it, the URL you enter is stored in the Focal Point® profile definition. If you change the URL the next time you login to the server, the new URL will overwrite the URL that is stored in the profile definition.
Login Name
This ID is usually assigned by a Focal Point® administrator, who also configures the workspace for the integration with System Architect.
Password
The password for the Login Name above.
3 Click Login.
When you login to the Focal Point® server successfully, the main SA-Focal Point® screen appears. You remain logged in for the current encyclopedia session, and bypass the Login screen when you run SA-Focal Point® subsequently, in the current encyclopedia session.
Note If you are not connected to the network where the server is located, a dialog informs you check server URL. If your login fails, your Login name and Password values may be incorrect. See Focal Point® troubleshooting tests and tips for more information.
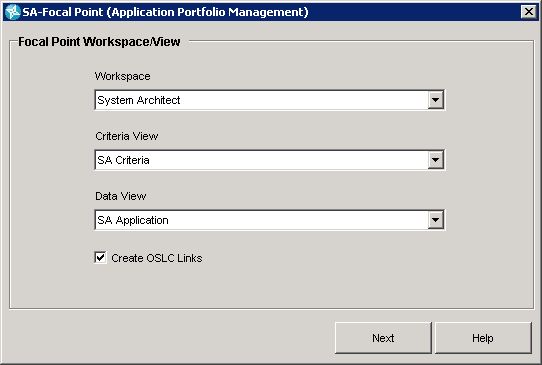
4 Click Create a new Focal Point profile. This leads you to the SA-Focal Point® Workspace/View window, where you complete the Workspace, Criteria View, and Data View fields as shown below.
You may also choose option Create OSLC links. This option will automatically create an OSLC link from the definition in System Architect to its counterpart in Focal Point® during the export to Focal Point® process. It is required that an OSLC Friendship is already configured to the same Focal Point® Server and Project before links can automatically be created. For instructions for configuring the OSLC Friendship, see Configuring service providers.
5 Click Next.
The Report File Selection screen is displayed.
6 In the Report File Selection screen, select report files and reports as follows:
▪In the Select Criteria Report File field, click Browse and select a criteria report file. A sample report file, Application Portfolio Management.RPT, is provided in C:\Program Files\UNICOM Systems\System Architect Suite\System Architect\Focal Point. This report is used in the default Application Portfolio Management profile.
▪In the Select Data Report File field, click Browse and select the data report you created to gather the repository data. Report files that you create for the Focal Point® integration should be in the HTML format. System Architect validates the report format and warns you if it is not of the HTML type. If the report is not of HTML format, then add the following in the report header that will make it HTML formatted:
SETTING { REPORTFORMAT 4 }
▪Click the Select Criteria Report Name drop-down and select a report.
▪Click the Select Data Report Name drop-down and select a report. The SA-Focal Point integration does not check report integrity, and the export may fail if you report contains syntax errors. A sample Report File Selection window is shown below.
7 Click Next.
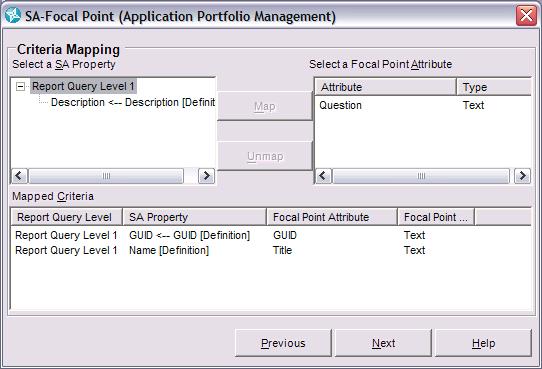
The Criteria Mapping screen is displayed, where you map System Architect properties to Focal Point® attributes. The list on the left contains System Architect properties; the list on the right is populated with Attributes retrieved from the Focal Point® criteria/ data view.
8 Click on a property in the Select a SA Property list, click the attribute to map to in the Select a Focal Point Attribute list, and click Map. Mapped properties and attributes are moved out of the list fields to the Mapped Criteria field. You can also Unmap properties from attributes if necessary.
Note For data to be exported successfully, the GUID must be both in the SA property list and the Focal Point® attribute list. They must also be mapped accordingly.
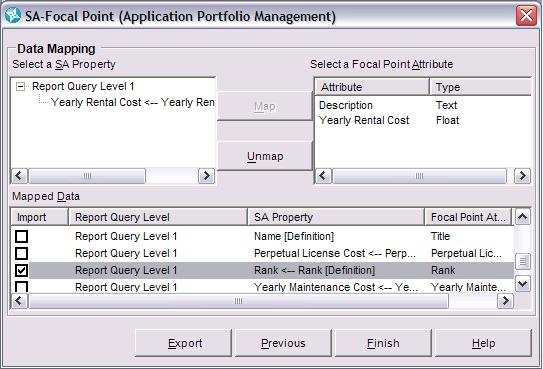
9 Click Next. The Data Mapping window is displayed, where you also map System Architect properties to Focal Point® attributes. The list on the left contains System Architect properties; the list on the right is populated with Attributes retrieved from the Focal Point® criteria and data view.
10 Click a property in the Select a SA Property list, click on the attribute to map to in the Select a Focal Point Attribute list, and then click Map. Mapped properties and attributes are moved out of the list fields to the Mapped Criteria field
Note Checking the Importcolumn option enables the SA Propertysuch as the Rank property shown below, to be imported back into System Architect from Focal Point®.
11 To complete this process, click on one the following options:
Export
Exports the data to Focal Point® without saving the profile options you entered above.
Previous
Returns to the previous screen, which in turn also enables you to go back to the screen before that, and so on.
Finish
Saves the values you entered in the steps above to Focal Point® profile definitions. The mapping options you selected are saved to Focal Point® mapping definitions. The next time you want to export data to Focal Point®, you can reuse this profile you saved by clicking on the Send Data from a previously saved profile option in the SA-Focal Point® window.
If you choose to close the dialog instead choosing one of the options above, a dialog prompts you if would like to save the profile.